> ## Documentation Index
> Fetch the complete documentation index at: https://docs.movestax.com/llms.txt
> Use this file to discover all available pages before exploring further.
# Database Integration
> Start building with Codestax from 0 to 1 your backend with PostgreSQL (Supabase) compatible managed database.
 # Build with Codestax by Movestax
Welcome to Codestax! This guide will help you get started with your first project in just a few minutes. From a prompt to a fully production deployed website seamless.
***
## 1. Sign Up and Log In
1. Visit the Codestax [login page](https://codestax.dev).
2. Create your account using your email or existing OAuth methods (Google, GitHub or e-mail).
3. Once registered, log in to access your Codestax initial page.
***
## 2. Create your first application with backend
1. Type your prompt asking for example to have a user session, or to store your grandma's recipe into a database.
2. Codestax will generate the code and propose scripts to create tables, views and other objects automatically.
3. If you decide to run the database within Movestax ecosystem you should first create a PostgreSQL for your project as described at under [Concepts -> Databases](/databases), make to click at Movestax logo under the chat session.
# Build with Codestax by Movestax
Welcome to Codestax! This guide will help you get started with your first project in just a few minutes. From a prompt to a fully production deployed website seamless.
***
## 1. Sign Up and Log In
1. Visit the Codestax [login page](https://codestax.dev).
2. Create your account using your email or existing OAuth methods (Google, GitHub or e-mail).
3. Once registered, log in to access your Codestax initial page.
***
## 2. Create your first application with backend
1. Type your prompt asking for example to have a user session, or to store your grandma's recipe into a database.
2. Codestax will generate the code and propose scripts to create tables, views and other objects automatically.
3. If you decide to run the database within Movestax ecosystem you should first create a PostgreSQL for your project as described at under [Concepts -> Databases](/databases), make to click at Movestax logo under the chat session.
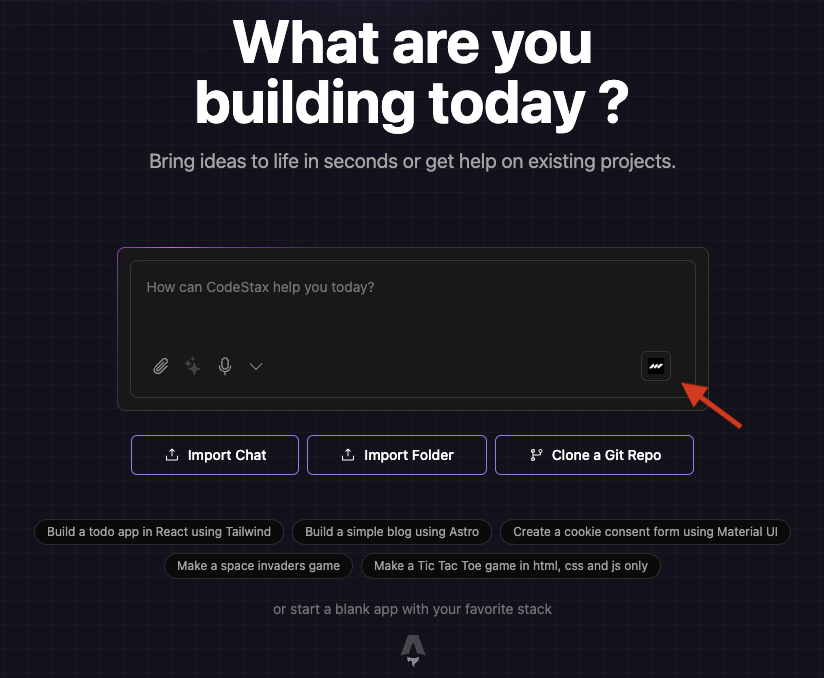 4. Select your chosen database.
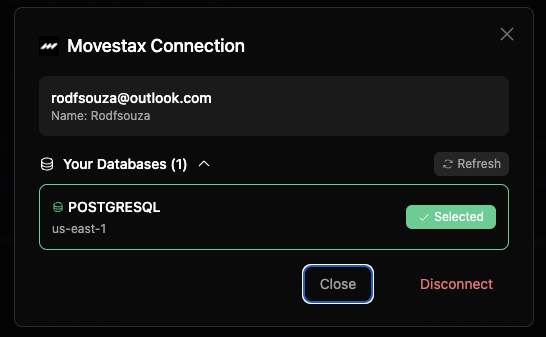 5. Once the database is selected after the artifacts for your database are generated you should see a screen similar to the one below:
 6. With the database selected, click **Apply Changes**, Codestax should connect to the database and create the objects as specified on the script.